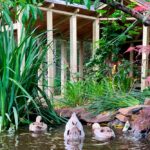
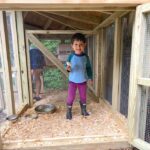
Need duck coop ideas? Come tour Waddle Inn!
Tyrant Farms' articles are created by real people with real experience. Our articles are free and supported by readers like you, which is why there are ads on our site. Please consider buying (or gifting) our books about raising ducks and raising geese. Also, when you buy through links on our site, we may earn an affiliate commission. Learn more
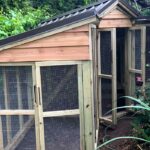
After a decade of raising ducks, we finally built the ultimate duck coop for our needs, Waddle Inn. If you’re looking for duck coop ideas, inspiration, and design tips, this article and video tour are for you!
Table of contents:
Check out the whole article or use the table of contents to jump right to the section(s) you’re interested in:
1. Terms: Duck coop vs. duck run — what’s the difference?
2. Why we built Waddle Inn versus something easier
3. Essential features of ANY duck coop
4. How to predator-proof your duck coop using our foolproof method
5. Video tour of Waddle Inn duck coop
6. Waddle Inn dimensions
7. Start to finish: Waddle Inn construction photos & notes
1. Terms: duck coop vs. duck run — what’s the difference?
If you’re new to backyard ducks and poultry, some terms may cause confusion. So before we dive in, let’s make sure we’re speaking the same language by providing basic definitions:
What is a duck coop?
A duck coop is a structure where domestic ducks are kept at night to keep them safe from predators. Typically, ducks are not kept in their coop during the day.
Secondarily, the coop provides a centralized spot for the ducks to lay eggs, allowing for easy egg collection by their human caregivers. Unlike chickens, ducks don’t perch/roost above ground to sleep (exception: Muscovies) or require nesting boxes. Instead, ducks stay on the floor of their coop and often lay their eggs in a single communal nest within the coop.
For clarity, a duck house is the same thing as a duck coop, although the terms are often used interchangeably.
What is a duck run?
A duck run is a covered, predator-proof enclosure some duck owners erect to keep their ducks safe from predators during the day when they’re not in their coop. The run is typically larger than the coop.
Duck runs are often either:
a) attached to the duck coop, or
b) covering/enclosing the duck coop.
For clarity, a duck pen is the same thing as a duck run, although the terms are often used interchangeably. In this article, we’ll be discussing duck coops, not duck runs.
What setup do we use for our ducks?
Our ducks spend their days in a backyard surrounded by a 6′ tall fence that’s filled with large perennial fruit and nut trees, both of which provide significant protection from aerial and ground-dwelling daytime predators. Our ducks are put into their coop at night and let out in the morning.
In our 10+ years raising ducks in our setup, we’ve never lost a single duck to a predator (knock on wood), despite being surrounded by an abundance of predators. However, it’s important to note that just as a well-built coop protects ducks from nighttime predators, duck runs are the only 100% effective way to keep ducks and other backyard poultry safe from predators during the day.
So even though we don’t utilize a run for our ducks, you may decide one is essential for your setup.
Do ducks have to have a coop or run?
If you’re going to raise ducks responsibly, it’s critically important that you construct a well-built, predator-proof duck coop BEFORE you get ducks. Without a safe coop to stay in at night, it’s not a question of if your ducks will be killed by predators, it’s a question of when.
A duck run isn’t essential, but it may be necessary in some situations. For instance, if our backyard didn’t have 6′ tall fencing and we didn’t work from home, we’d have a duck run to protect our ducks by day.
(Related: In addition to this article, we’d also suggest you read our article How to build a long-lasting, predator-proof duck coop and run.)
2. Why we built Waddle Inn versus something easier
First, a shoutout to our friend and neighbor, Trionne, for suggesting the name “Waddle Inn” for our duck coop! Of all the funny suggestions we received from our online and offline friends, this one made us chuckle the most.
We should make it clear that Waddle Inn is NOT the coop we would have built if we were new duck parents. In the beginning, we didn’t know much about ducks or how they’d use a coop in our particular climate region.
If you’re new to ducks and planning a coop, we’d encourage you to keep it simple. Don’t make a huge investment on your first coop because your needs and wants are very likely to change once you gain experience. Ours certainly have!
Our original duck coop design flaws

Our original duck coops (the Quacker Boxes) were pretty good first duck coops that served us and our ducks well over the years. However, with a decade of hindsight, they had some design flaws, including:
- Treated lumber – We didn’t use pressure-treated lumber throughout, which led to some wood rot. Modern pressure-treated wood in a coop does not pose a health risk to ducks.
- Wasted space – We live in Zone 7b with moderate winters, but temperatures can still sometimes dip into the single digits. During cold snaps, we thought our ducks would spend most of their time in the enclosed parts of their coops to shelter from the weather. Nope. Even during the coldest, snowiest periods, our ducks were out in the open, screened areas of their coops enjoying the frigid breeze and lovely views. Apparently, it’s not cold enough here for our ducks to ever want to take shelter. And in our hot, humid summers, our ducks need all the open air and breezes they can get.
- Mobile vs anchored – We initially planned to move our duck coops around, so they were designed to be mobile. However, our back yard quickly filled up with perennial fruit and nut trees and a large duck pond, so there was nowhere and no way to move the coops. Plus, ducks are somewhat creatures of routine who want to sleep in the same place every night.
Fast forward 10 years: we’re now fully committed to ducks being in our lives for the rest of our lives and we have no intention of moving out of our home in the foreseeable future. With our prior duck coops in need of replacement and imminent plans to get more ducks soon, we decided now was the time to make an investment in the permanent duck coop of our dreams: Waddle Inn.
Even if you’re not as committed to ducks as we are or you don’t want to make a significant time and money investment into a duck coop, there are still duck coop tips, ideas, inspiration, and features detailed in this article that will be helpful for you!
3. Essential features of ANY duck coop
When planning a duck coop, there are four overlapping features to consider:
A. Size, footprint, and location;
B. Aesthetics;
C. Functionality;
D. Security (by far the most important factor – so we break it out into the next section of the article).
Construction warning:
Before diving into the four features above, an important duck coop construction warning… Be VERY mindful of every stray nail, screw, scrap of metal or hard plastic, or any other construction material dropped or left on the ground. If ingested, these could be deadly to your ducks.
Safety tips:
- Do your construction in an area your ducks don’t have access to — or temporarily fence off the area.
- Work on tarps if at all possible and clean up at the end of each day.
- If at all possible, run a magnetic sweeper over the construction area after each day to pick up metal scraps, screws, etc.
Duck coop size, footprint, and location:
Size – When planning a duck coop, the first question you might have is how many square feet does each duck need in a coop? We take a deeper dive into the answer in our article How to build a long-lasting, predator-proof duck coop and run, but the general rule is 2-6 square feet of space per duck, with some variance based on breed size.
Footprint – A simple square or rectangular shape is best for a first-time DIY duck coop, unless you or someone helping you is a skilled carpenter.
Location – Ideally, you can position your coop in a spot in your yard where:
- it gets morning sun;
- no large tree branches are hanging overhead that could snap off and fall on the coop;
- you can easily turn on a light to see your coop at night (for your emotional wellbeing as much as your ducks – ha);
- it doesn’t get too wet or soggy during storms;
- it has extra protection, such as being inside of a fenced back yard.
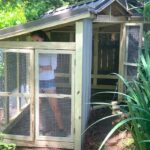
Our coop size and setup: old versus new
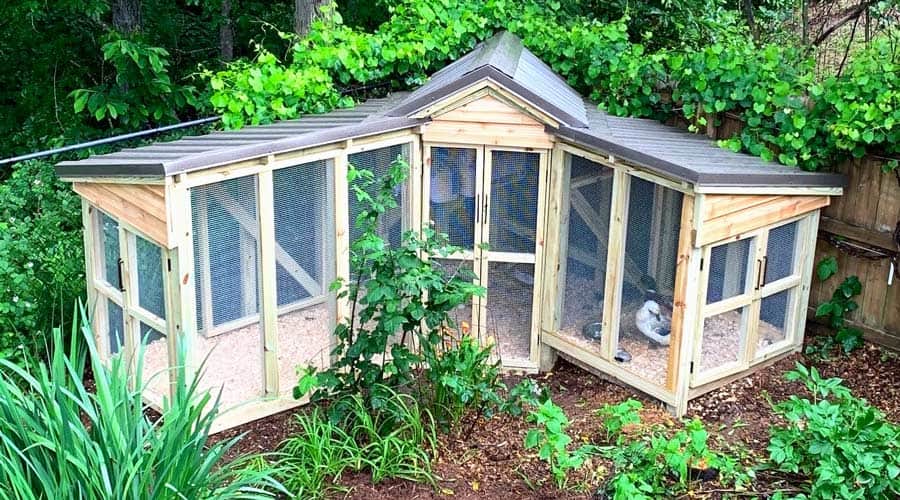
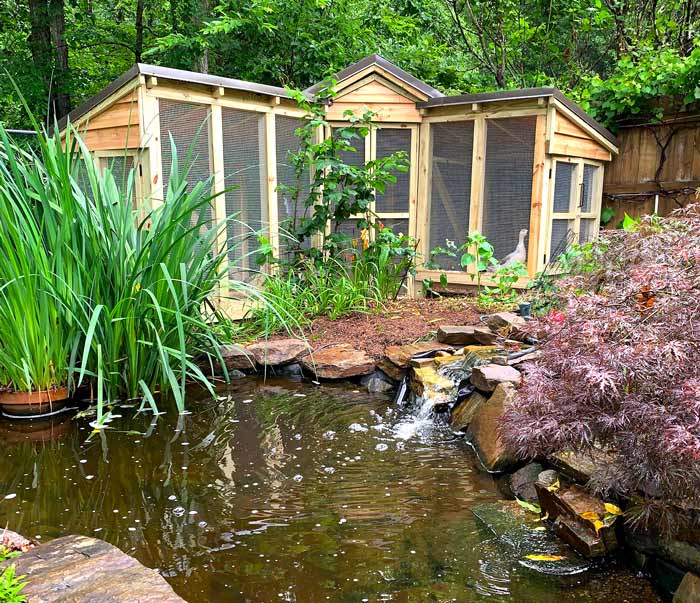
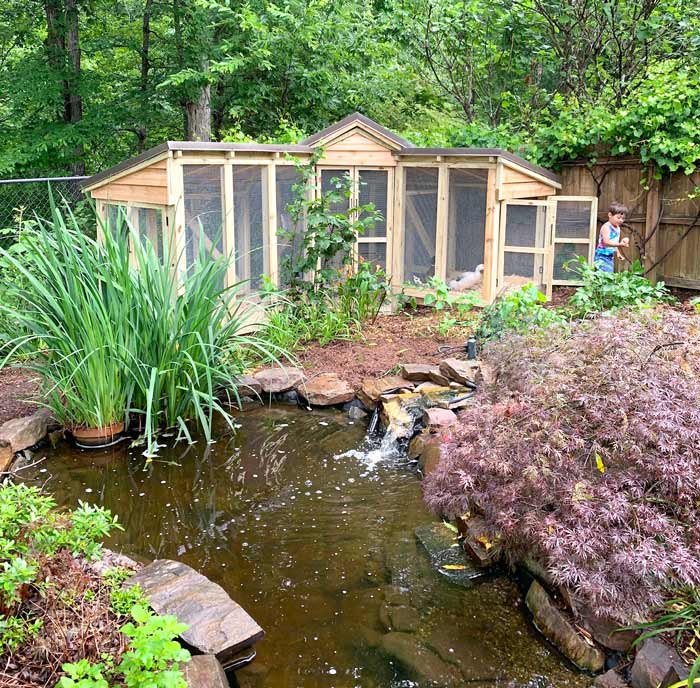
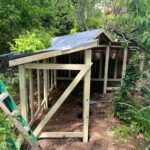
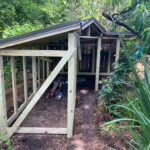
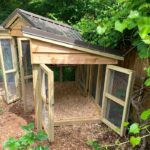
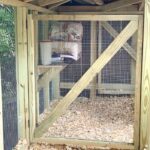
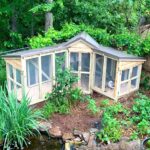
In total, Waddle Inn is a little over 60′ square feet. This gives us plenty of room for more ducks.
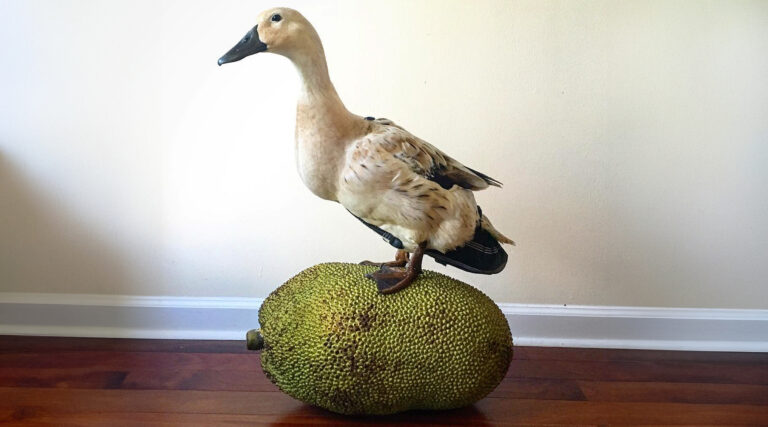
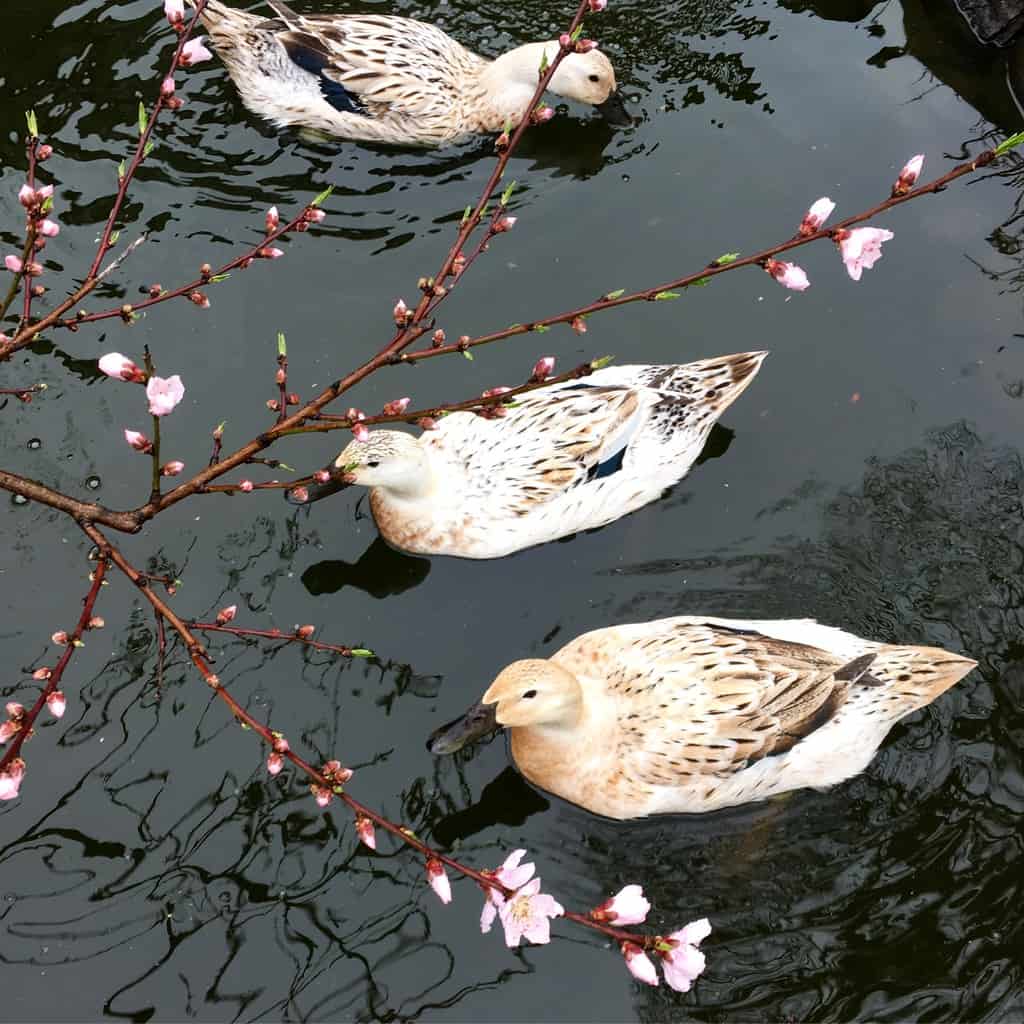
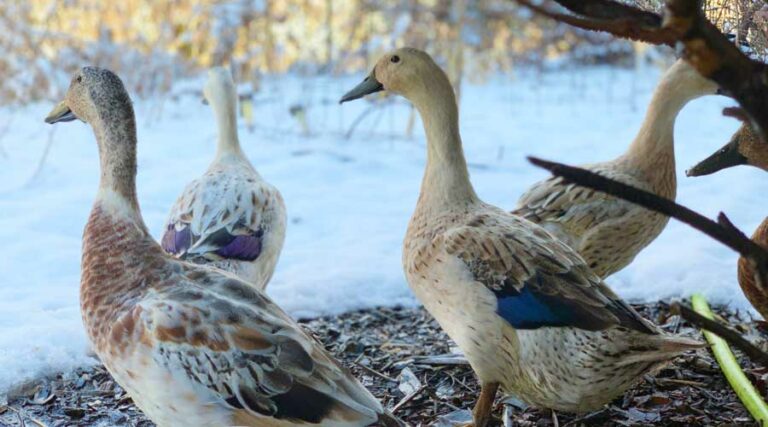
Our two old coops were each 2′ x 7′, for a combined 28′ total square feet. Since we raise Welsh Harlequin ducks, a mid-size breed, our old coops could accommodate 7-8 ducks, at most. (Housing arrangements were further complicated by us also having a drake who needs to be kept separated from the ladies for most of the year. See: Should you get male or female ducks or both?)
We plan to get more ducks and ducklings, plus some additional larger-sized breeds. Therefore, we wanted a single coop that could accommodate more ducks while having internal doors/partitions that would allow us to:
- keep our drake separate from the girls,
- safely house smaller ducklings separately from our mature ducks, and
- integrate new mature ducks into our flock (example: if we get ducks from a local rescue operation).
As for the location, we decided to keep our ducks’ new coop in the same spot as their old coops since it’s the ideal spot in our yard. Why? It’s got extra protection via fences, it gets morning sun, they’re used to their coop being there, and there aren’t tree branches hanging above.
Granted, this location choice complicated things a bit since we had to make temporary nighttime accommodations for our ducks in our garage while their coop was being built over a two week period. No, they weren’t thrilled about it, but we bought their forgiveness with lots of tomatoes and other favorite treats.
Aesthetics of your duck coop
Aesthetics certainly aren’t the most important factor in a duck coop, but don’t overlook it! If you’re like us, you’ll appreciate a duck coop that looks nice — even if your ducks couldn’t care less and poop on your masterpiece.
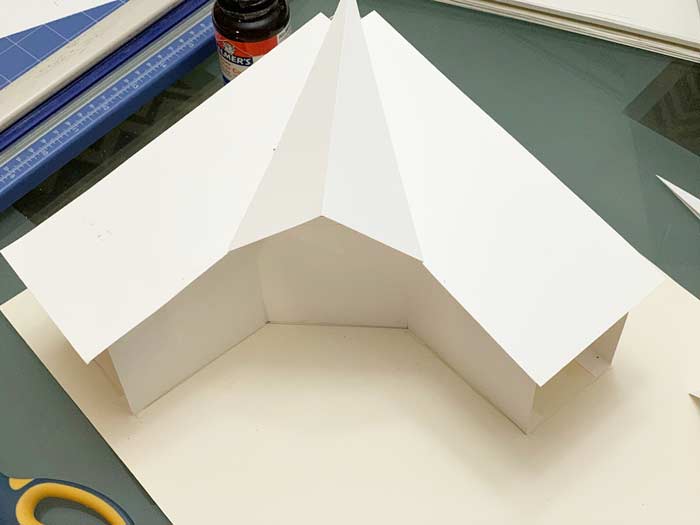
During the design phase, we gathered images of nice coops and sheds with features we liked. We also put together a small cardstock paper model of the coop we envisioned. (You may want to do both these things when planning your duck coop as well.)
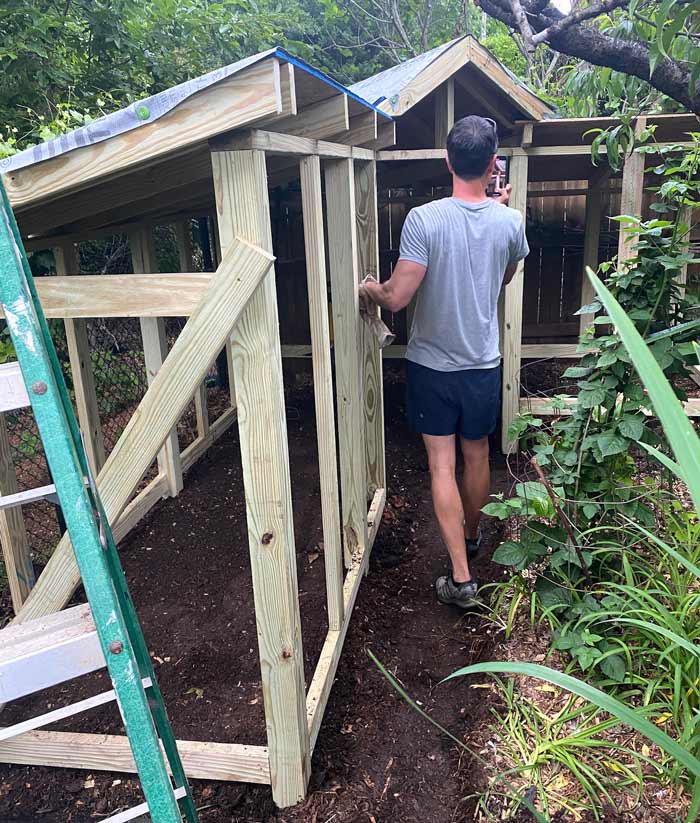
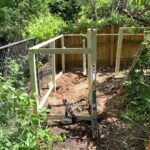
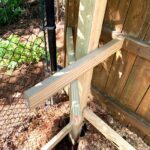
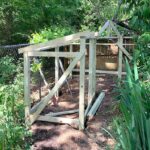
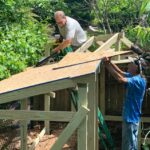
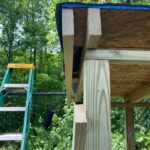
The corner coop design and features of Waddle Inn required far more carpentry skills and tools than we have available, so we worked with Todd Wright, our favorite, trusted contractor here in Upstate South Carolina, to make the design come to life. Todd and his partner Dicky knocked it out of the park!
Functionality
We’ve already discussed the key functions we needed in our duck coop, but here are a few other things you should consider when planning your own duck coop:
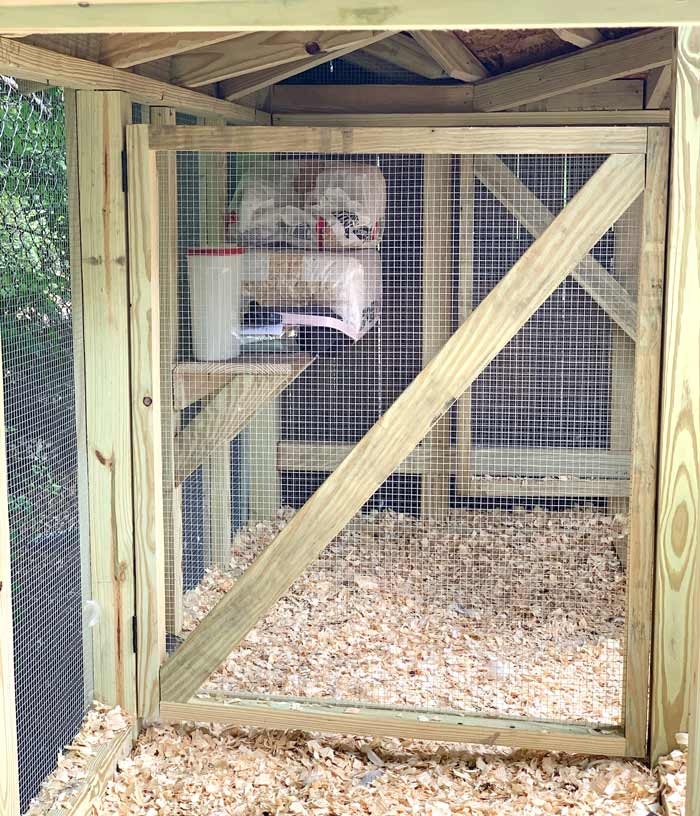
1. Shelf space
It’s wonderful having a large shelf INSIDE the coop to put our ducks’ oyster shell, pine shavings, and pool maintenance supplies. We couldn’t do that with our old coops.
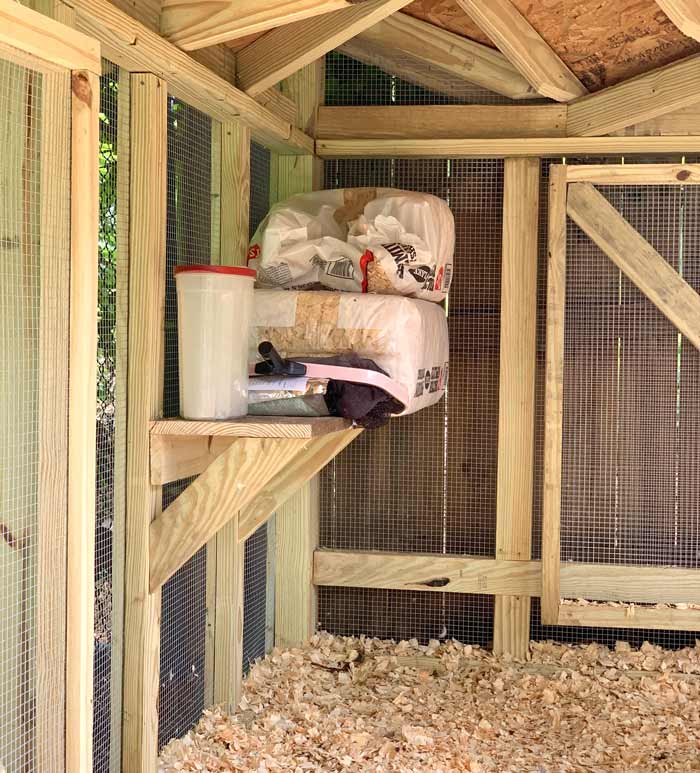
We still keep their food and supplements in a climate-controlled environment (inside our back door).
2. Comfortable access/height
Our old coops were 3′ tall, which was less than ideal. Accessing the coops for cleaning, egg collection, etc. meant squatting or crawling. And you really don’t want to crawl inside a duck coop.
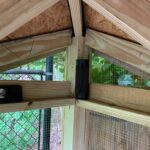
At the same time, we didn’t want a coop so tall it swallowed our back yard or shaded out the muscadine vines growing behind it. Waddle Inn is the perfect height for our needs and features three access doors. At the center point behind the main doors, I (6’1″ tall Aaron) can stand fully upright. I only have to squat a little to walk through the other parts of the coop.
And our duck-fertilized muscadine grape vine still gets plenty of sun!
3. Other future uses
While we’d like time to stop so we can live here forever without aging, that’s not how things work. At some point, we’ll join the beloved ducks we’ve lost at the Great Pond above where tomatoes are ripe every day of the year and bowls of earthworms and crickets are served with every meal. (Human caregivers are served omelettes.)
Or maybe we’ll just decide we need to sell our current house sometime before we depart this mortal coil to meet The Great Duck. It’s a horrifying thought, but whoever eventually lives in our home after us might not be a “duck person.” But they might need a nice shed or kid’s playhouse. If so, Waddle Inn could easily be converted to accommodate.
Likewise, you might eventually break your waterfowl addiction and decide ducks/poultry aren’t for you. If so, it would be nice to find another use for your coop.
4. How to predator-proof a duck coop, the Tyrant Farms’ method
The most important feature you need to pay attention to in your duck coop design is predator-proofing. Period. Everything else is of secondary importance.
Yes, this rule applies whether you live in the city or country. For instance, there are actually far more raccoons per square mile in urban areas than rural areas, so don’t think lots of people means lower predator risk for your ducks.
Ducks are fairly low on the food chain. Hawks, owls, and eagles eat them. Native and non-native mammalian predator eats them, including your neighbor’s dog.
Even snakes will sometimes give ducks a try (or at least eat duck eggs in an un-secured coop). We have a friend whose ducks were killed inside their coop by a snake who ended up spitting the ducks back out due to their size.
So here’s how to predator-proof your duck coop:
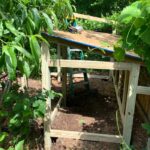
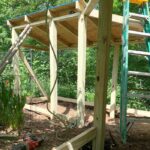
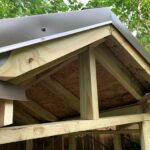
1. General structure
The overall coop should be anchored to the ground (ideal) or heavy enough so that it can’t easily be tipped over by a large predator or blown over by strong winds.

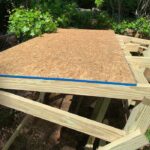
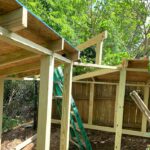
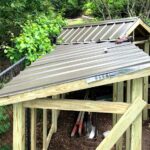
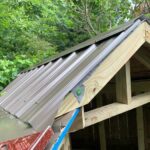
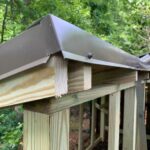
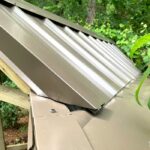
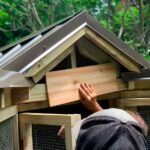
2. Roofing
The roof can’t be ripped off or opened, and there should be no spaces or gaps large enough to allow for snake access. The roof also serves to prevent precipitation from entering the structure.
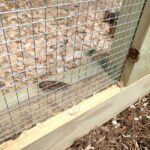
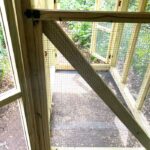
3. Walls
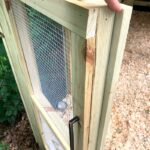
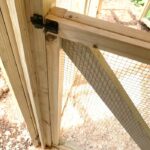
Any wall openings should be covered with securely installed hardware wire no larger than 1/2″. (A larger size wire will allow raccoon hands to reach in or snakes to squeeze in.) Sharp/cut ends of hardware wire should not be accessible/exposed to ducks.
*Cold climate coops should have more solid walls with fewer openings. Related read: Duck winter care tips from cold-climate experts.
**Solid walls may also be necessary if you live in an area where large predators like bears and bobcats are common since these predators can rip through hardware cloth.
4. Windows
Any window openings should be covered with securely installed hardware wire no larger than 1/2″, with no spaces or gaps large enough to allow for snake access.
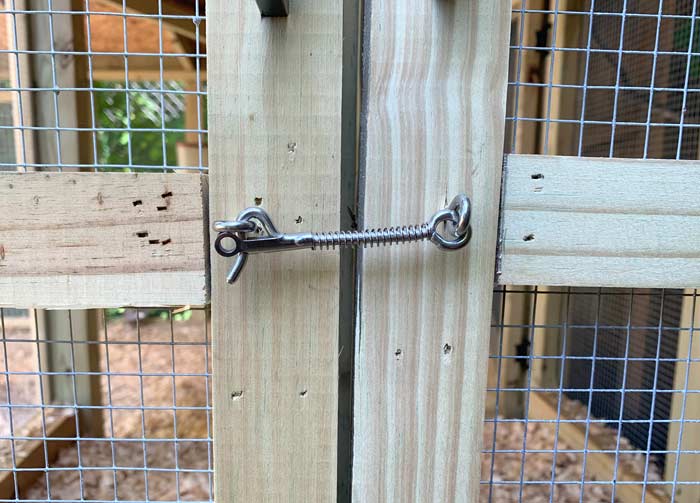
5. Doors
Doors should close nice and snug all around. Any gaps that allow predator hands to reach through or snake access will be exploited.
Spring-loaded latches are especially important on coops in order to prevent raccoons from being able to unlock the coop. Yes, raccoons can and will figure out how to flip open standard latches.
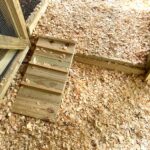
6. Floors
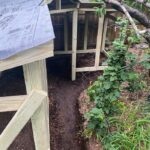
The floors are one of the most important yet overlooked part of duck coop security. That’s because predators can and will dig under and into a coop.
Also, rodents will tunnel in to a coop to eat duck food, and large rats may even kill your ducks. And tunnels made by rodents can also be used by snakes.
Therefore, ensuring that nothing can dig under and into your duck coop is essential. Three typical ways people try to predator-proof the floor of their poultry coops are some combination of the following:
- Hard floors – Hard, non-porous flooring like concrete. Yep, this prevents predators from below but it traps moisture and will cause a stinky, unhygienic mess in the long run.
- Predator skirts, aka predator aprons – Predator skirts/aprons prevent large animals from digging in, but do not prevent rodents. (See this video from Carolina coops if you’re not familiar with predator skirts.)
- Trench caging – Trench cages (2′ deep perimeter trench with buried hardware wire attached to base of coop) prevent large animals from accessing the coop but may not fully prevent tunneling rodents. A trench cage is also very difficult to dig and install.
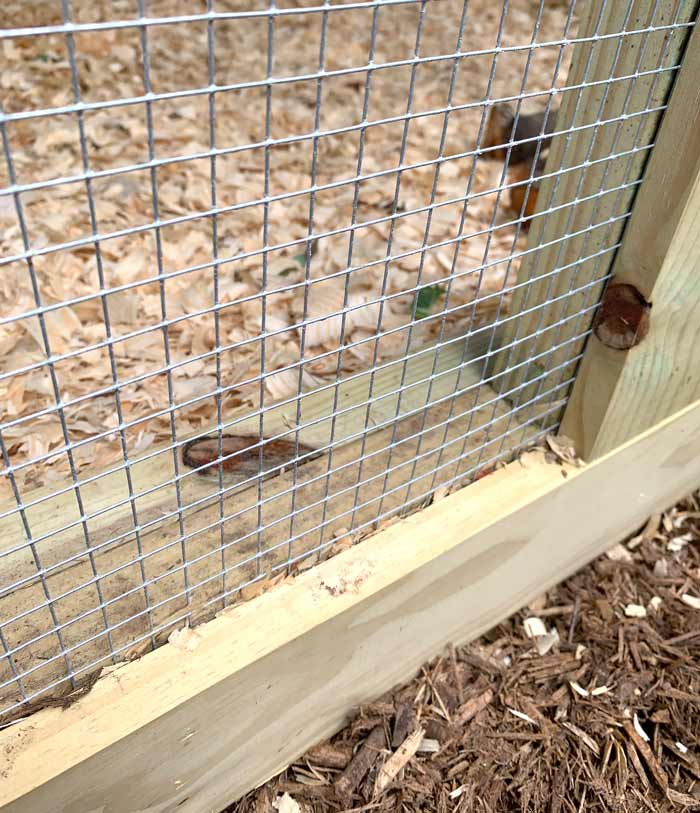
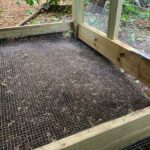
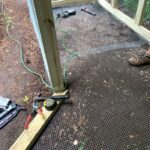
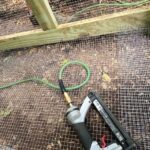
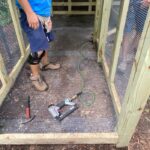
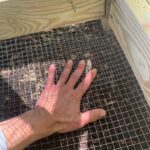
Our preferred solution to predator-proofing a duck coop floor is simple, foolproof, and economical. We install 1/2″ hardware under the coop that is secured to the foundation walls. The hardware wire is installed over the soil with some give to allow people to walk on it without pulling it loose (the soil below provides structural support).
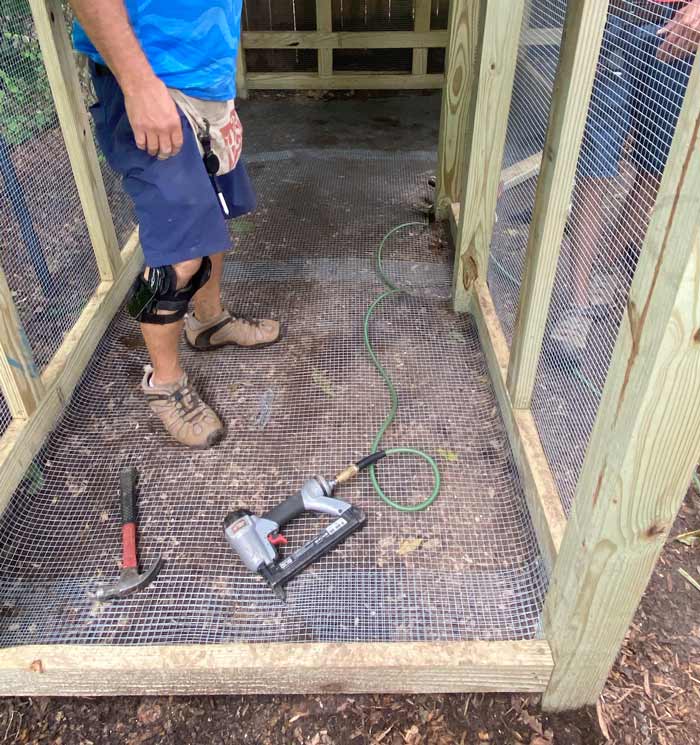
Any sharp, cut points on the hardware wire is either removed and/or bent to prevent duck foot injury. Further, the hardware wire is ALWAYS covered with at least 2-3″ of large-flake, low-dust pine shavings, our preferred bedding for duck coops. (See our duck coop bedding comparison to find out why.)
We use large sheets of hardware wire and any overlapping sections have at least 4″ of overlap. Additionally, wherever hardware wire sheets are joined/overlap, wire string securely ties them together. (We use the wire that comes with the hardware wire rolls.)
We completely predator-proofed Waddle Inn with a single 48′ x 100′ roll of Seboss 19-gauge 1/2″ hardware wire. Our predator-proof floor system for ducks is relatively simple and inexpensive to install, provides 100% protection, and means you don’t have to install any secondary floor defenses like predator skirts or trench caging.
How long will hardware wire last underground?
In case you’re wondering: how long will good hardware wire last underground? Answer: At least one decade in our hot, humid climate with high acid soil.
While removing our old duck coops, we also removed the old hardware wire beneath them. It had a little bit of discoloration, but was still in otherwise perfect condition 11 years after being buried!
5. Video tour of Waddle Inn, the ultimate duck coop
Want to go on a quick video tour of Waddle Inn? Watch below!
Note: If you’re running ad blocking software, the video may not display. Ads help us make this site free for you while compensating us for our time and effort, so please temporarily disable any ad blocking software to view the video. Thank you!
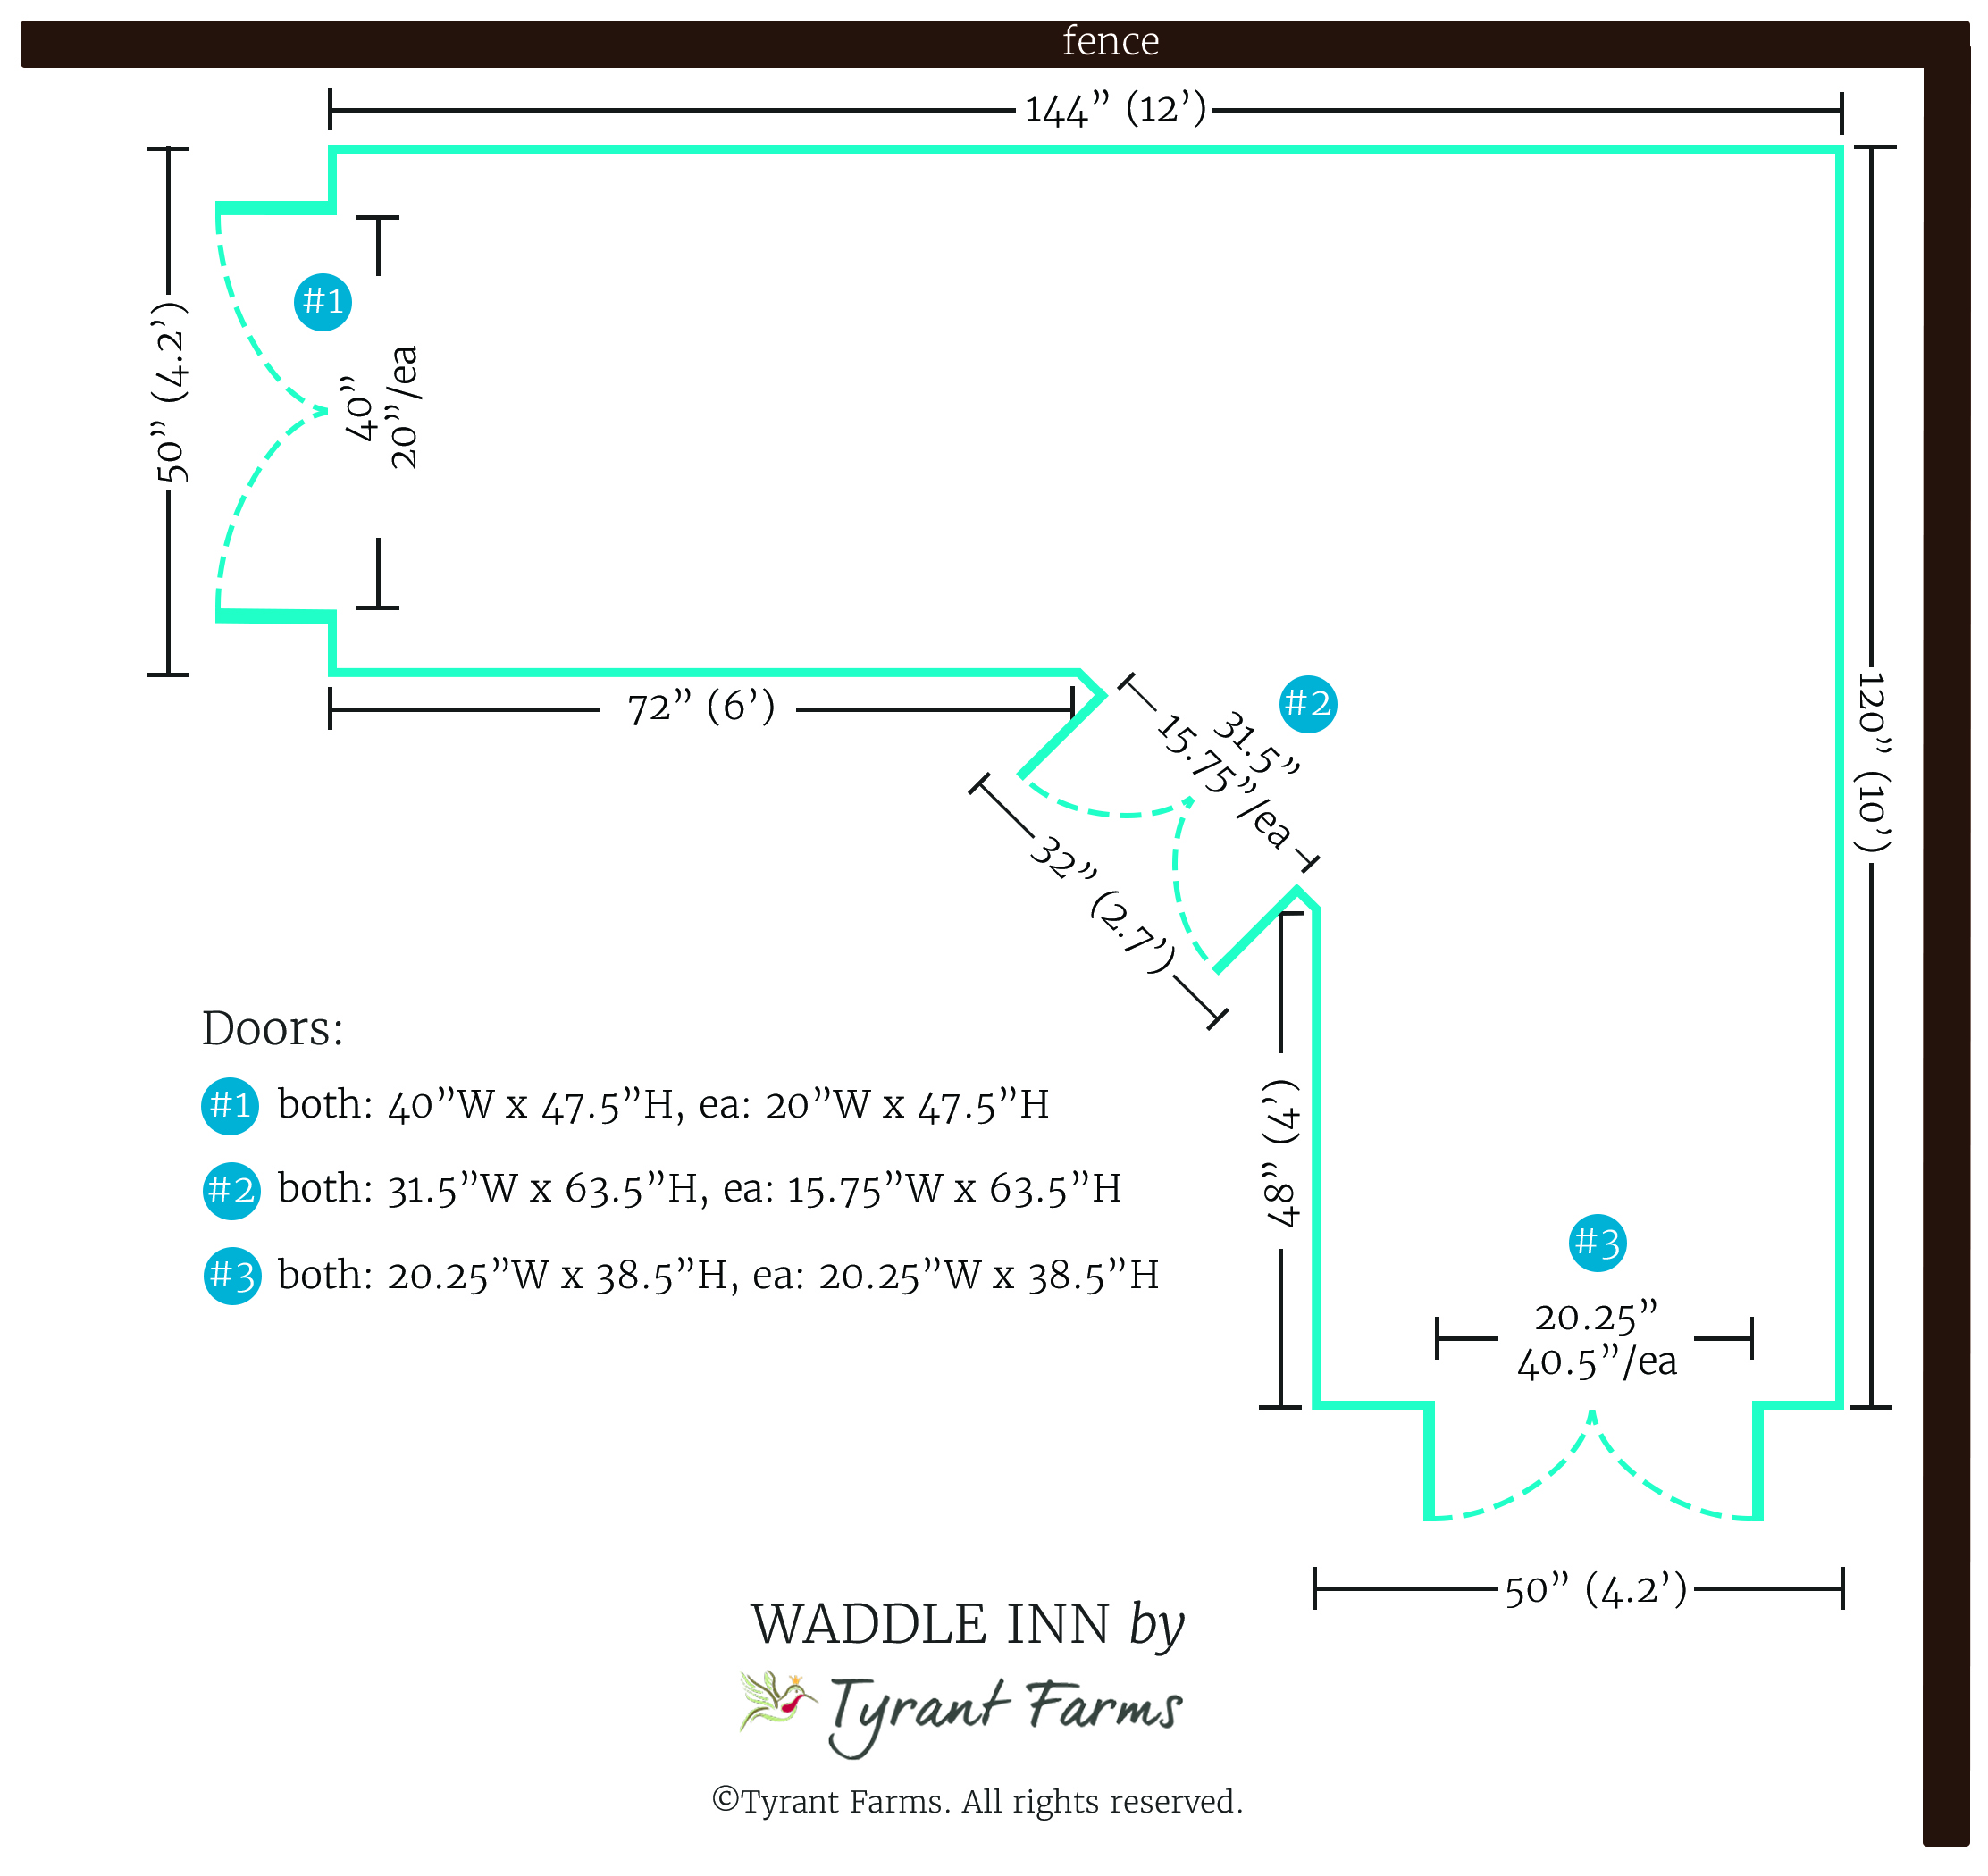
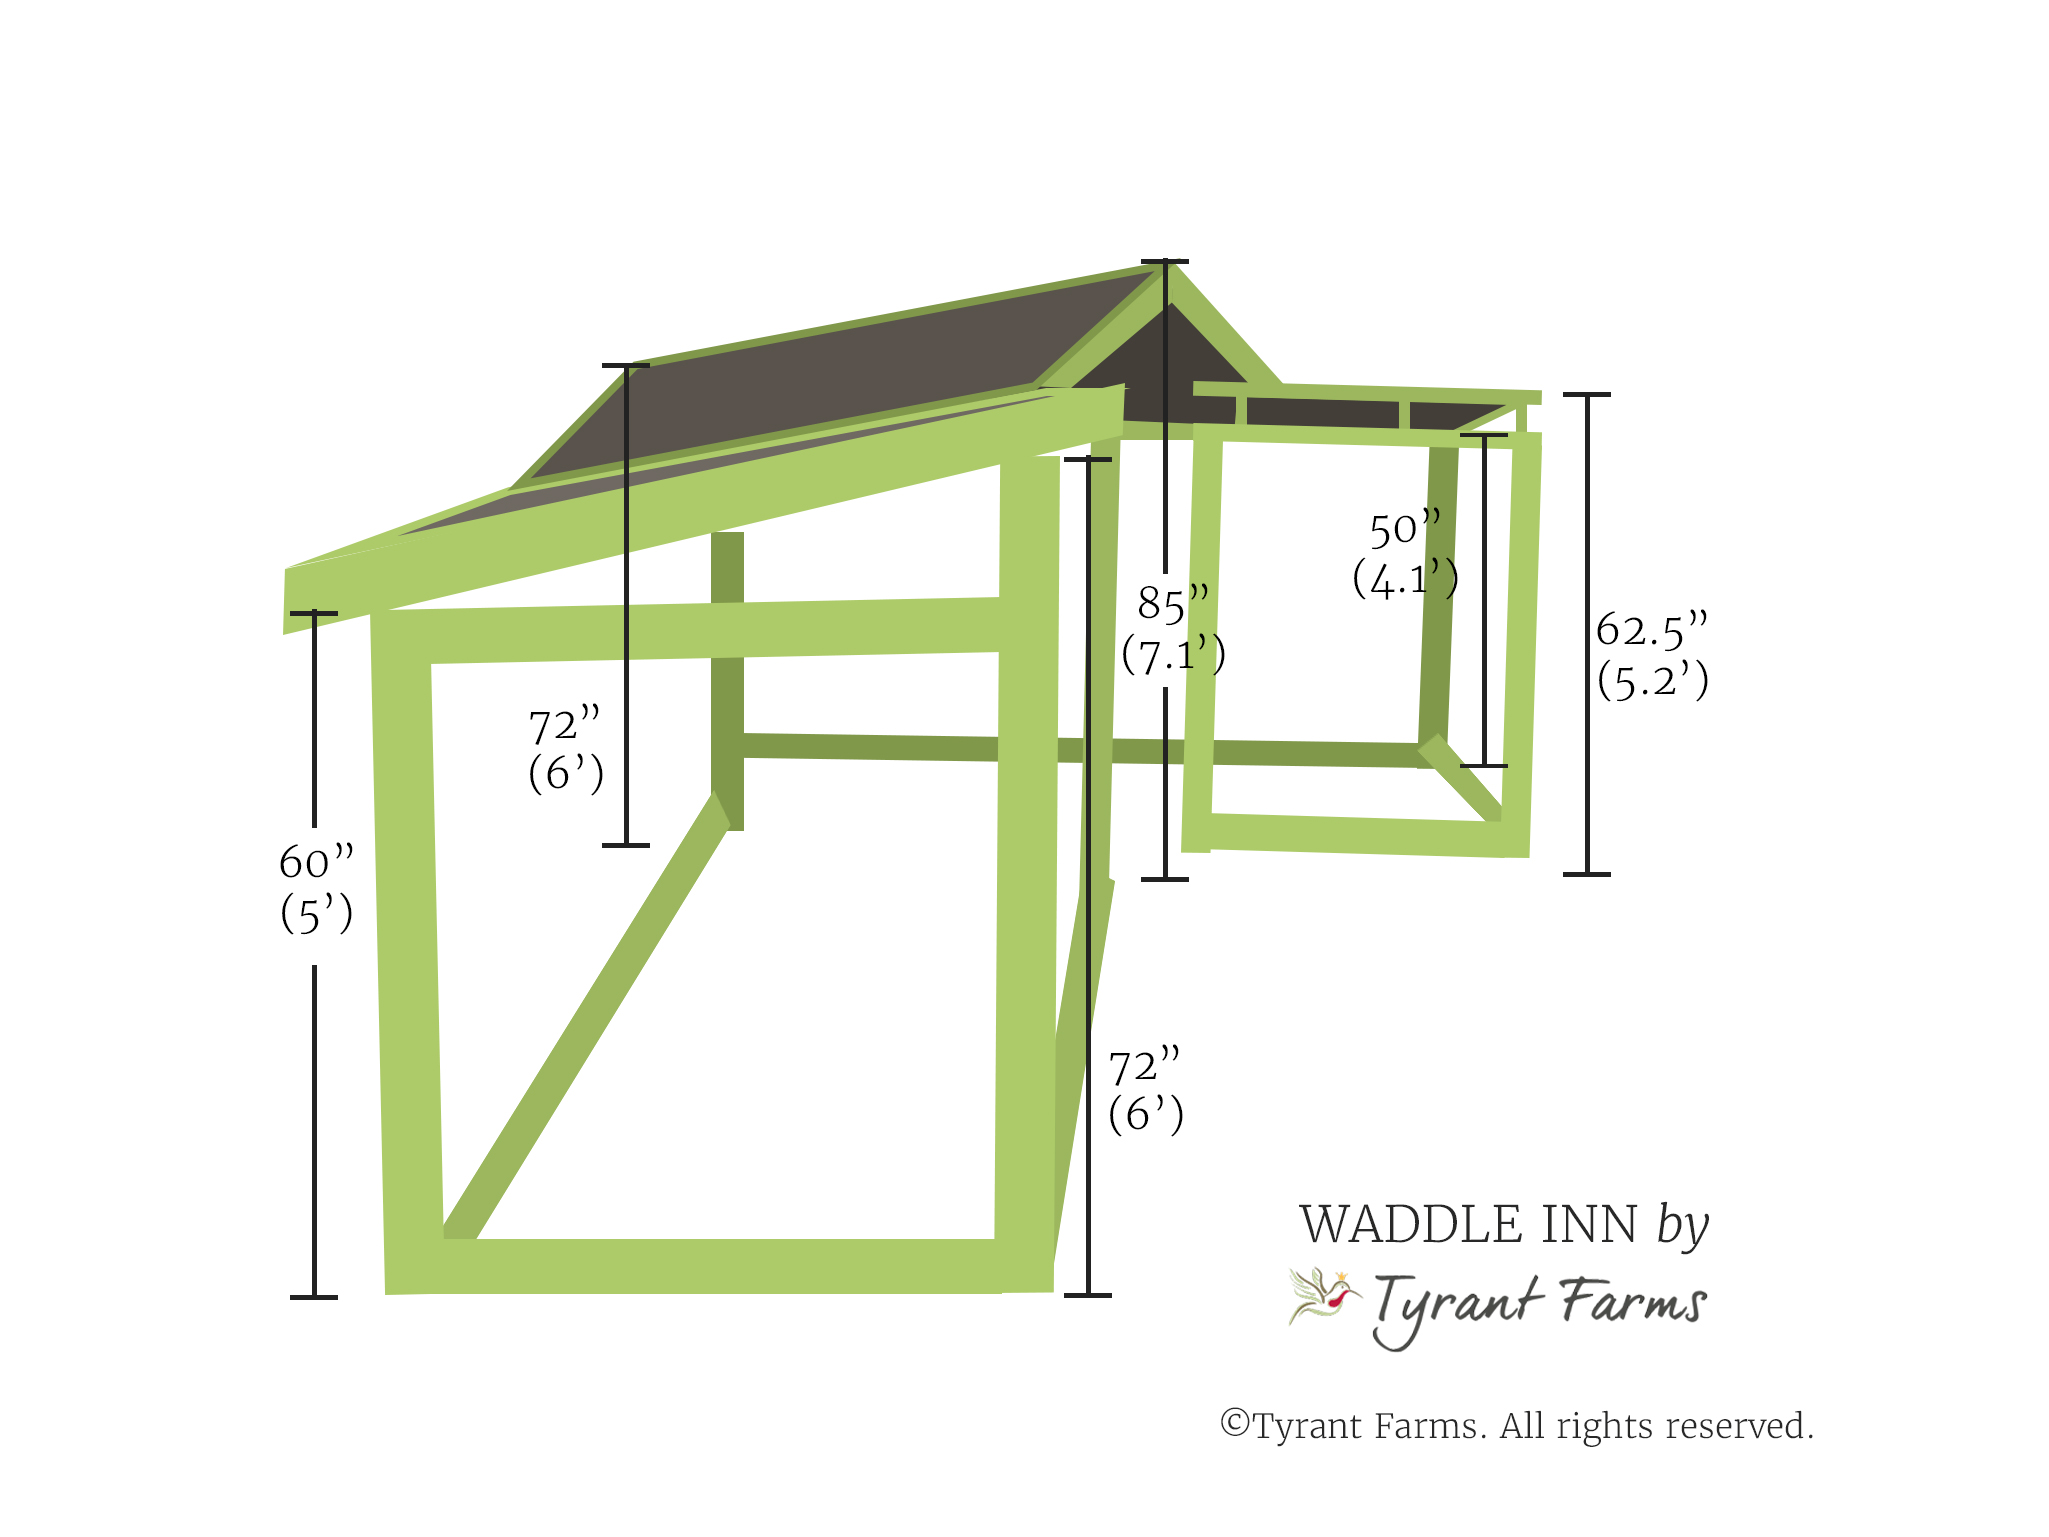
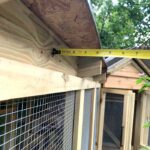
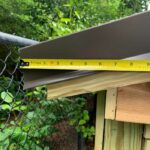
6. Waddle Inn dimensions
If you’d like to use the designs and plans from Waddle Inn to build your own duck coop, the diagrams below will help:
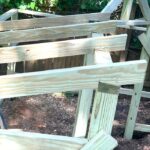
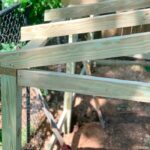
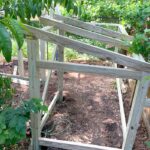
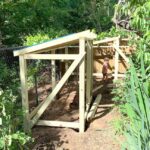
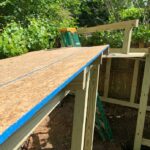
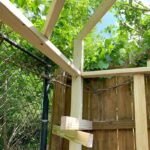
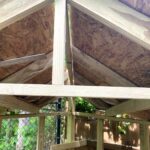
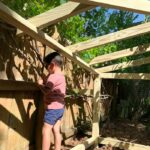
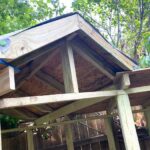
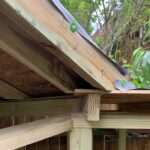
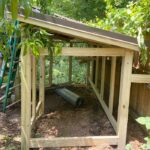
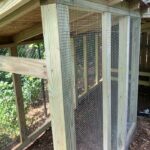
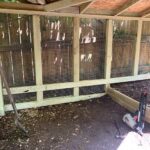
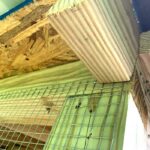
7. From start to finish: Waddle Inn construction photos & notes
Want to see the Waddle Inn buildout from start to finish? Or take a closer look at certain features as they’re built? Our duck coop construction photos below should help!


We hope the information in this article helps you design and build the predator-proof duck coop of your and your flock’s dreams!


Flap on over to these other helpful duck articles:
- 11 things you should know BEFORE raising ducks
- How to build a DIY self-cleaning backyard duck pond
- 5 tips to keep your ducks from destroying your yard or garden
- 17 tips to keep your ducks (and chickens) safe from predators
- Where to buy ducks or ducklings for your back yard or small farm
- How to raise ducklings, a step-by-step guide
- How to choose the right duck breed(s) for YOU
- 3 tips: How to get your ducks to like you
… or browse more helpful duck articles from Tyrant Farms!


Waddle Inn looks beautiful! I was just looking at your Quackerbox article last week, as I’m planning to build a better coop this summer for my ducks too, and then saw this brand new coop and got so excited! Thanks for the virtual tour, I love all the thoughtfulness y’all put into the planning. 🙂
Out of curiosity, how long did this project take start to finish?
I’m also curious to hear more info about why you chose not to do a concrete floor, you mentioned it could trap moisture?
Hi Lyd! As we mention in the article, this duck coop buildout was a little beyond our skill level (and toolkit), so we used a professional contractor who has an assistant. It was actually their first coop, but they’re very experienced and creative builders. The buildout on this coop took them about 5 business days from start to finish.
As for the coop floor, concrete will trap moisture inside the coop, especially at the spots where the wood frame and concrete join. That could create hygiene issues/pathogen buildup and will also accelerate wood rot which lessens the life of the coop. We prefer a coop flooring that’s breathable, allows the wood to dry out, and also allows soil microbes and worms to help assist in our modified deep litter method. Every few months when the bedding has built up, we’ll completely remove it and put the old bedding in compost or use it as mulch around our perennial fruit and nut trees. At that point, the bottom layers of bedding will be full of earthworms and mostly decomposed. Then we start over with new bedding and the process repeats.
Thank you for sharing your knowledge – has been sooooo helpful for me as a new duck carer. I have 6 adorable call ducks who have stolen my heart! I would love to build this coop and am wondering if you have actual plans and a materials/cut list that I could purchase? I’m a DIYer with advanced beginner skills and taking a structure rom concept and dimensions to completion is a little beyond my skill set. Thank you, Alison
Hi Alison! Back when we built our original Quacker Boxes, there was a free CAD-like software program called Google Sketchup that we used to design everything in 3D. Unfortunately, that program is no longer around and there aren’t any similar free software programs for doing plans/designs that we have experience with. Aaron (my husband) is planning to put together a coop materials list from our receipts but hasn’t had a chance to do that yet.
Thank you Susan, look forward to seeing the list and perhaps its time for me to stretch my building skills (maybe get a friend to help). I love your website and turn to it again and again for great info, help and ideas.
Nice layout. I’m just starting to think about the “second run” and the only thing I would add to your design would be a solid board at the base so I can weed whip around it without cutting the hardware cloth. I liked the inside doors to section it off too. BTW, if you’re interested in some purebred Saxony ducklings to add to your flock, let me know. I have a momma here in Greer that REALLY wants to sit right now.
Thanks for the offer, Douglas! We’re not quite sure when we’re getting new ducks or ducklings – we have a hectic summer schedule so it’s currently on the back burner. Out of curiosity, how would you rate the breed from a friendliness/sociability with humans standpoint? We obviously recognize that there are individual differences within a breed and that how they’re raised makes a huge difference, but are just curious to hear your observations and experiences.
As for the coop design, we actually have additional finishing pieces running around the entire foundation of the coop to provide extra support for the wall/window hardware wire, cover any sharp tips, and make things look better. The only spot where there’s some exposed flooring wire (shown in the video) is where the coop goes uphill and has a corresponding step up. Something you might consider is sheet mulching around your coop with cardboard, then putting mulch on top. That would kill out the grass around your coop/run so you wouldn’t have to weed whack.